A lot of popular brands launched their CPU coolers this year but I got fortunate enough to get hands-on with one of them before the official launch.
Arctic sent me their Freezer 33 eSports One CPU cooler a few months ago but due to some complications, it reached me very late. I wasn’t able to test it when I got it because my testing RIG motherboard died. So I ordered a new one. I am very thankful to Arctic that they sent me their Bionix fans and the cooler for review from Germany.
SPECS
| Heatsink | Aluminum Fins x 49, Thickness:0.5 mm, 123mmx150mmx80mm |
|---|---|
| Base | Direct touch Ø 6 mm x 4 |
| Fan | 120 mm, 200 –1,800 RPM (controlled by PWM) |
| Bearing | Fluid Dynamic Bearing |
| Noise Leve | 0.5 Sone |
| Current/Voltage | 0.20 A/+ 12 V DC per Fan |
Unboxing
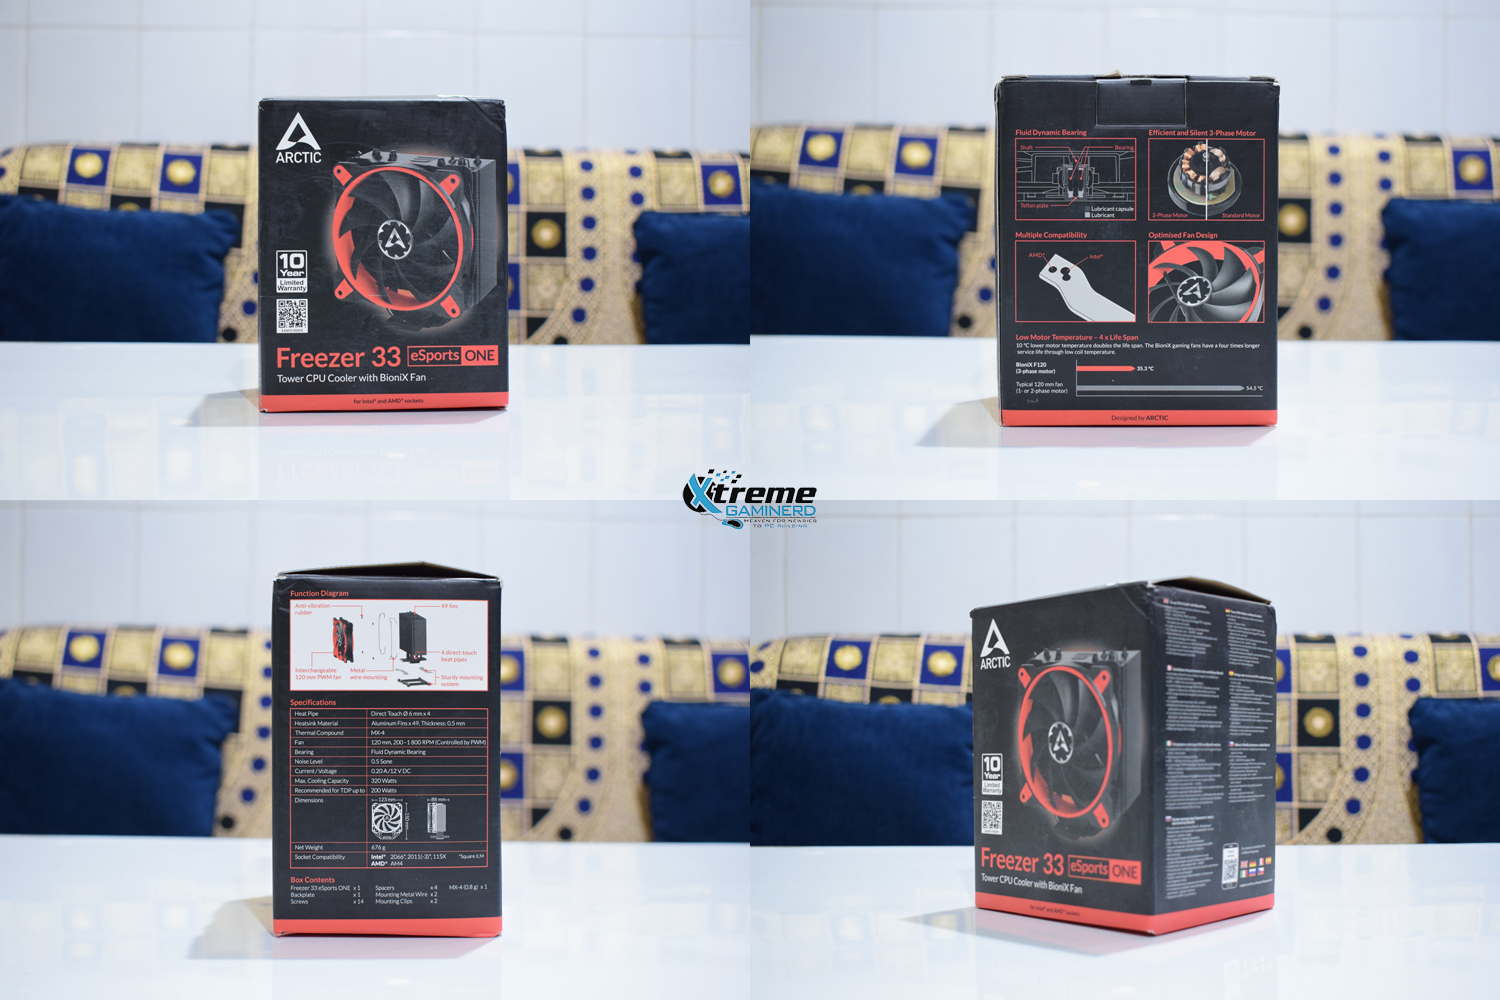
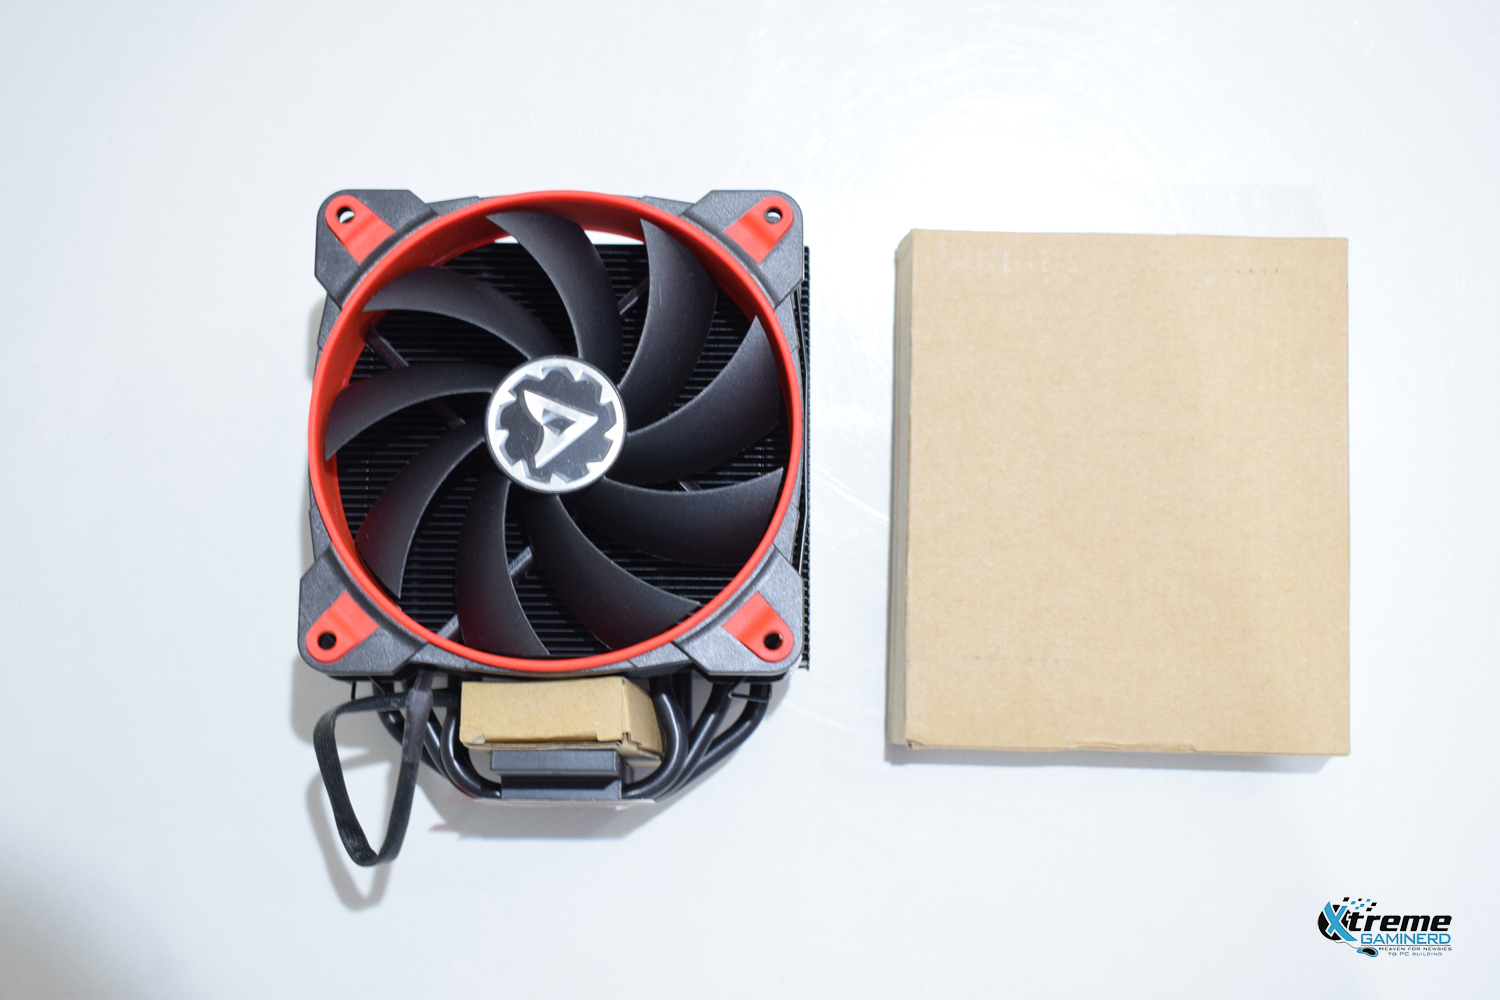
The packing was fine. The best thing which I liked about its box was the description of the cooler and the installation method. Arctic made good use of the box sides in explaining everything you need.
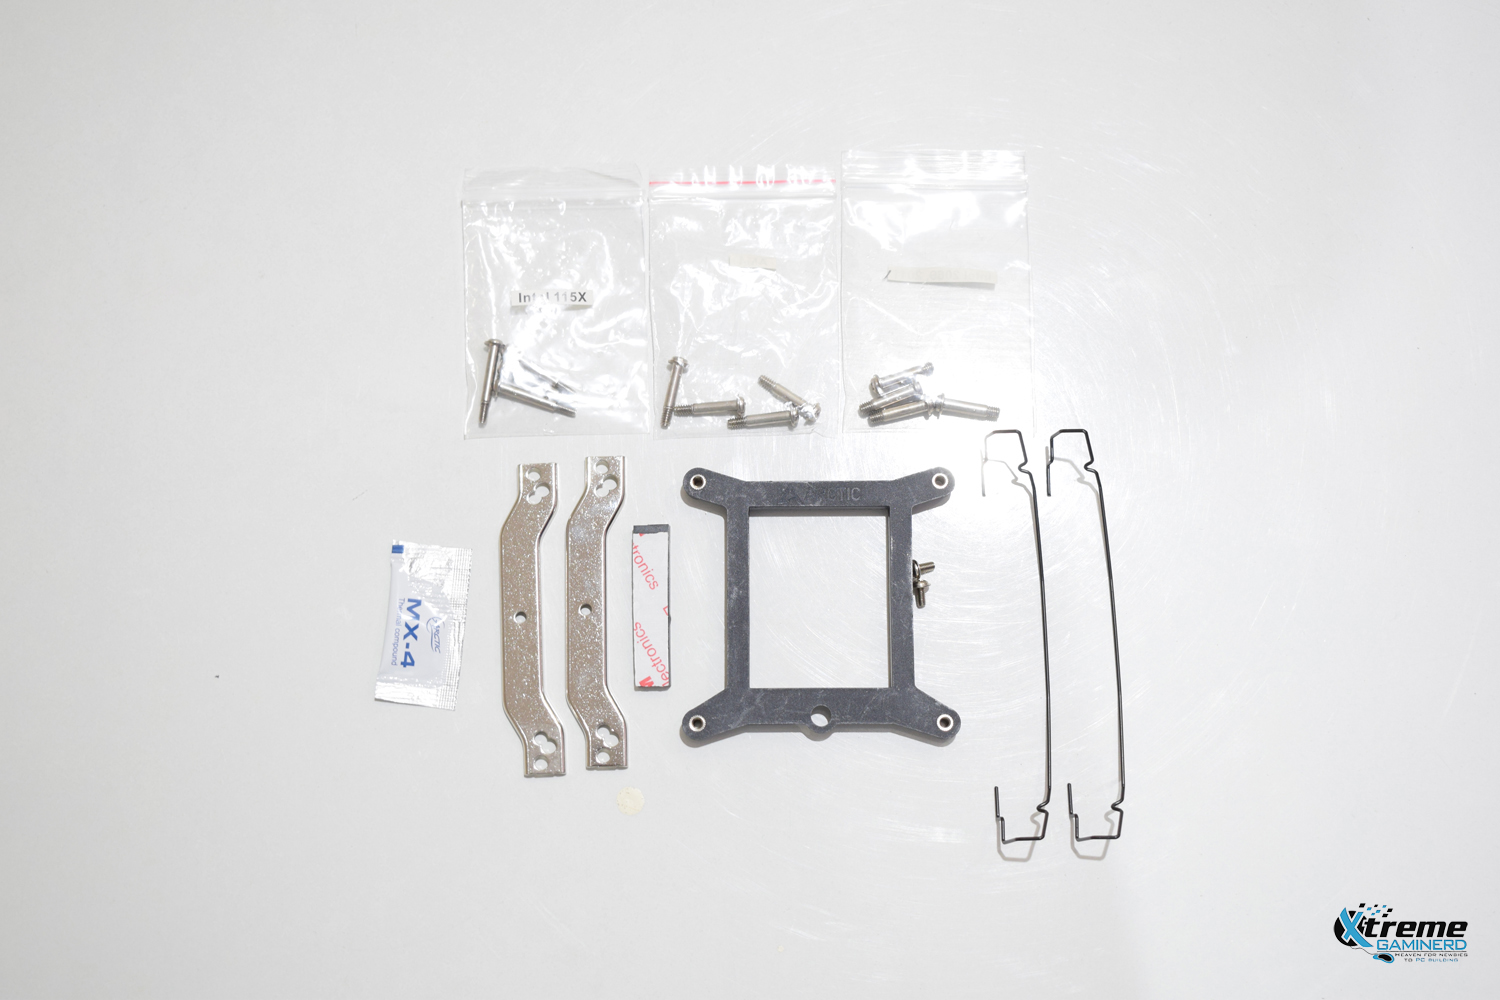
Inside the box, you will find the necessary things that are used to install the Cooler. There were two additional fan clips for attaching the fan and a rubber which I didn’t use. As far as the accessories are concerned, you can clearly tell from looking at them, that the installation process is going to be very easy.
The only thing that I didn’t like is that the MX-4 thermal compound was in a small packet. Yes, it is obvious that they can’t provide a big tube with a budget cooler like this but a small tube should be a good replacement if one ever wants to re-install the cooler. Anyways, not a big deal for me.
Taking a Close Look
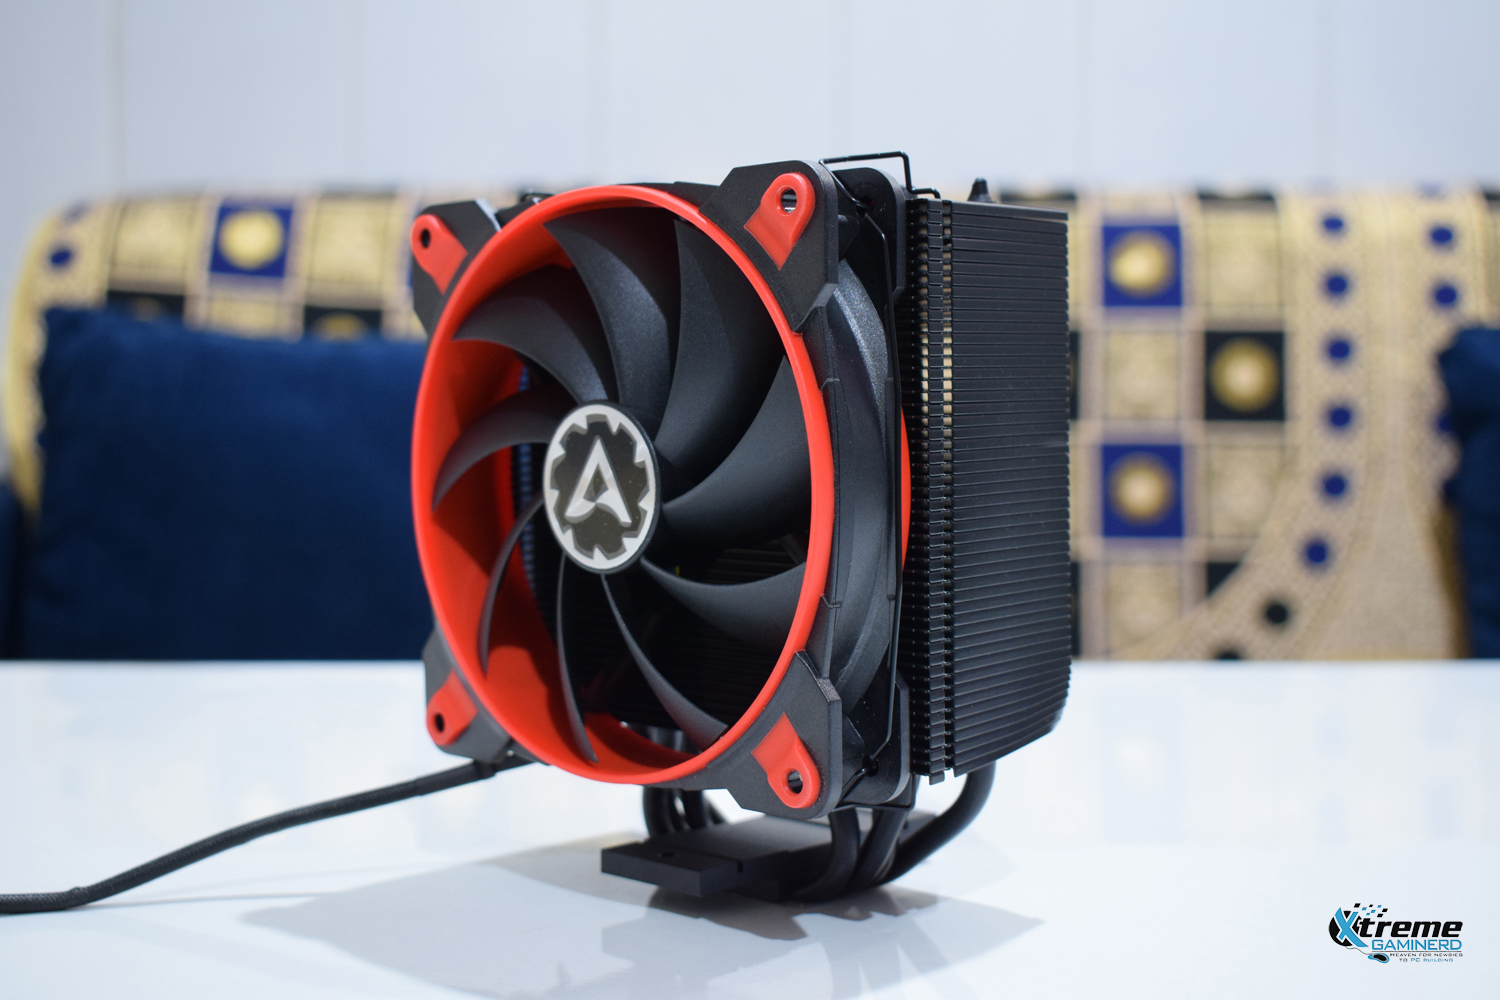
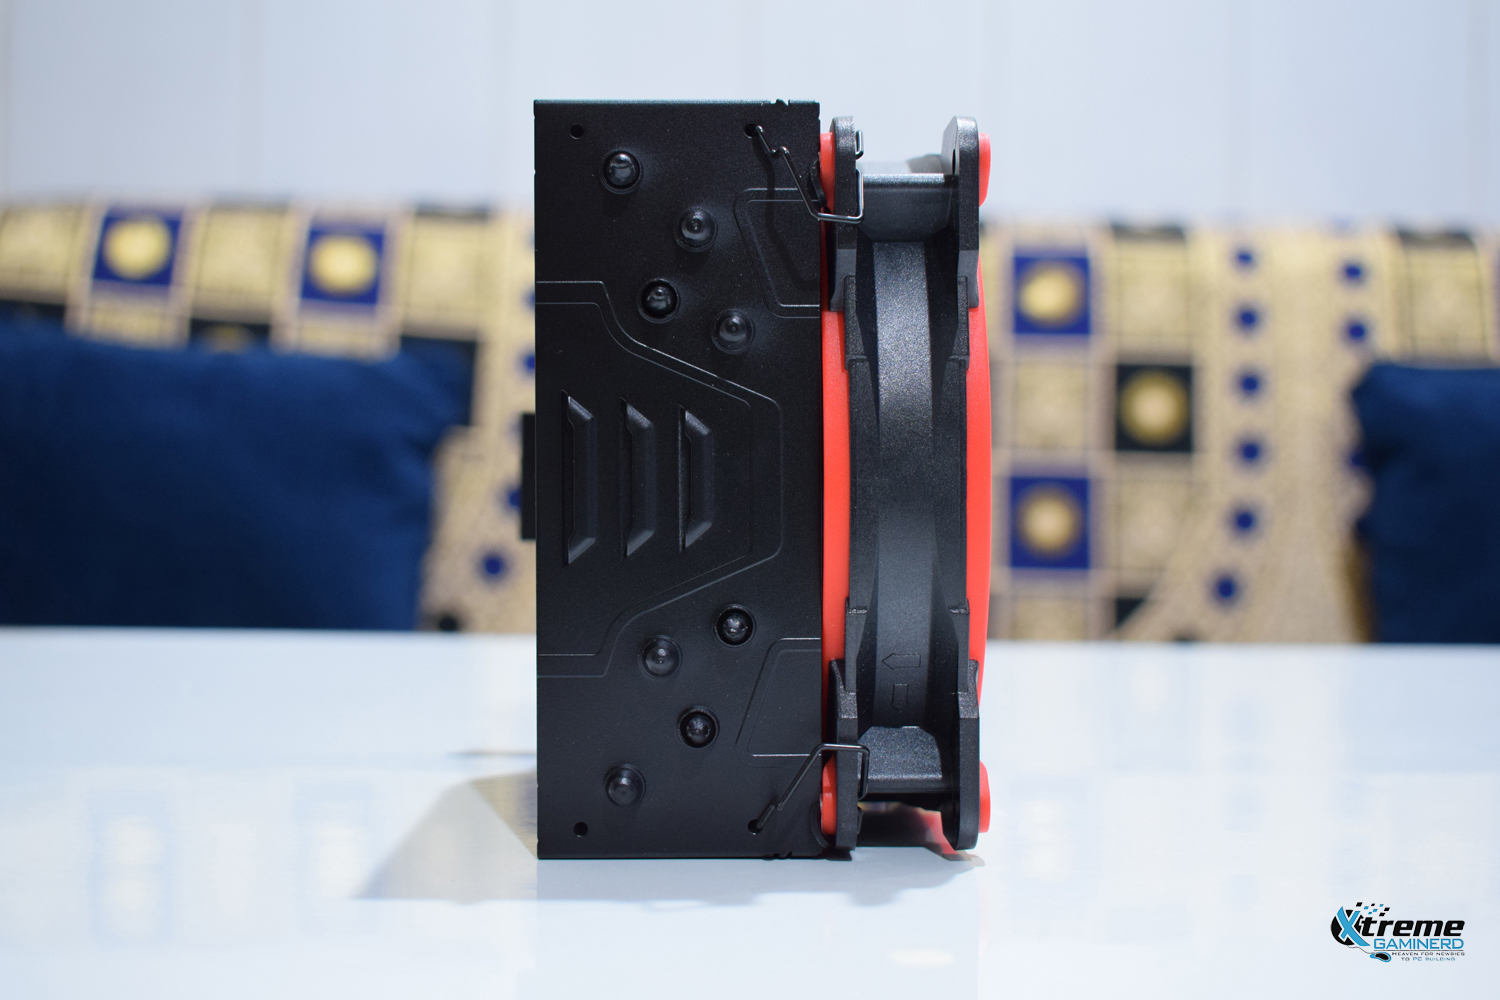
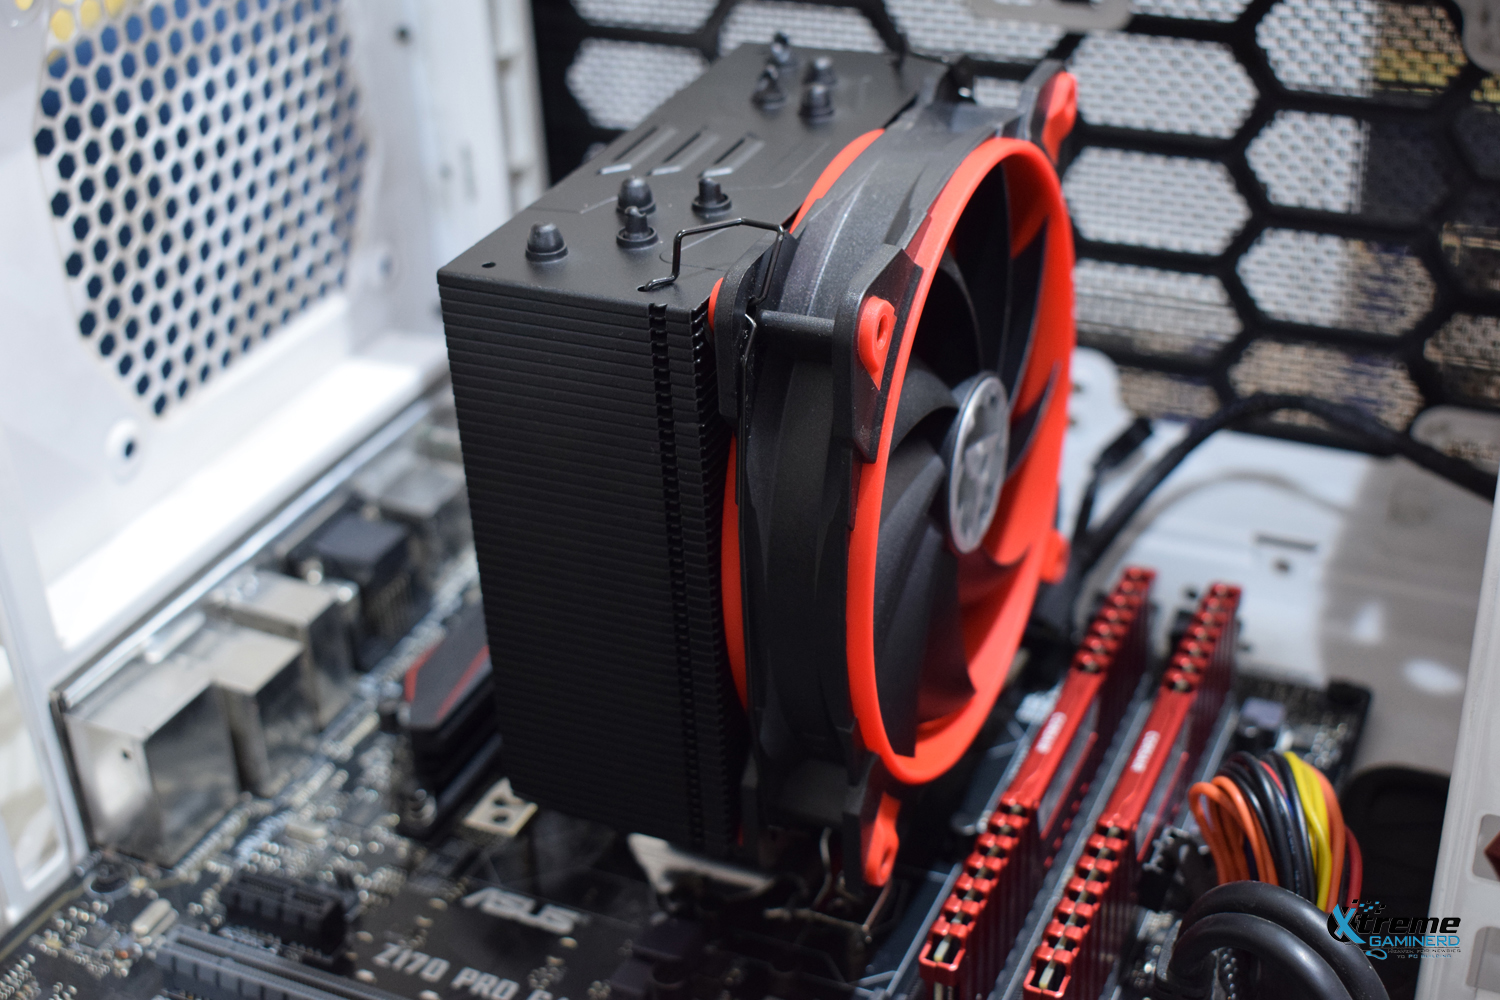
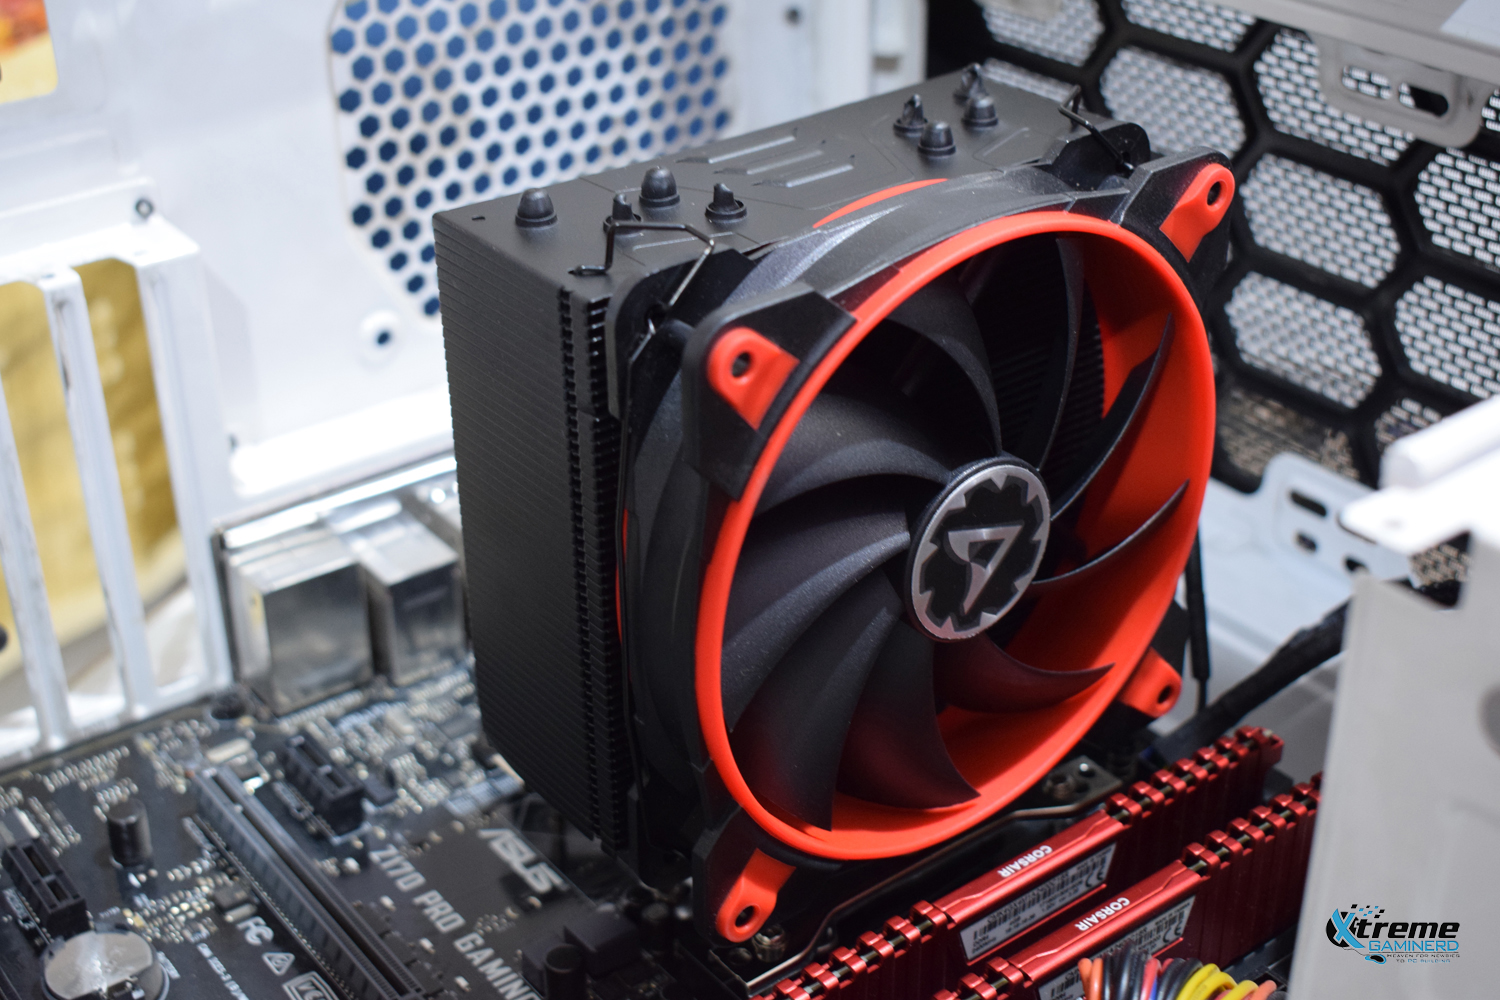
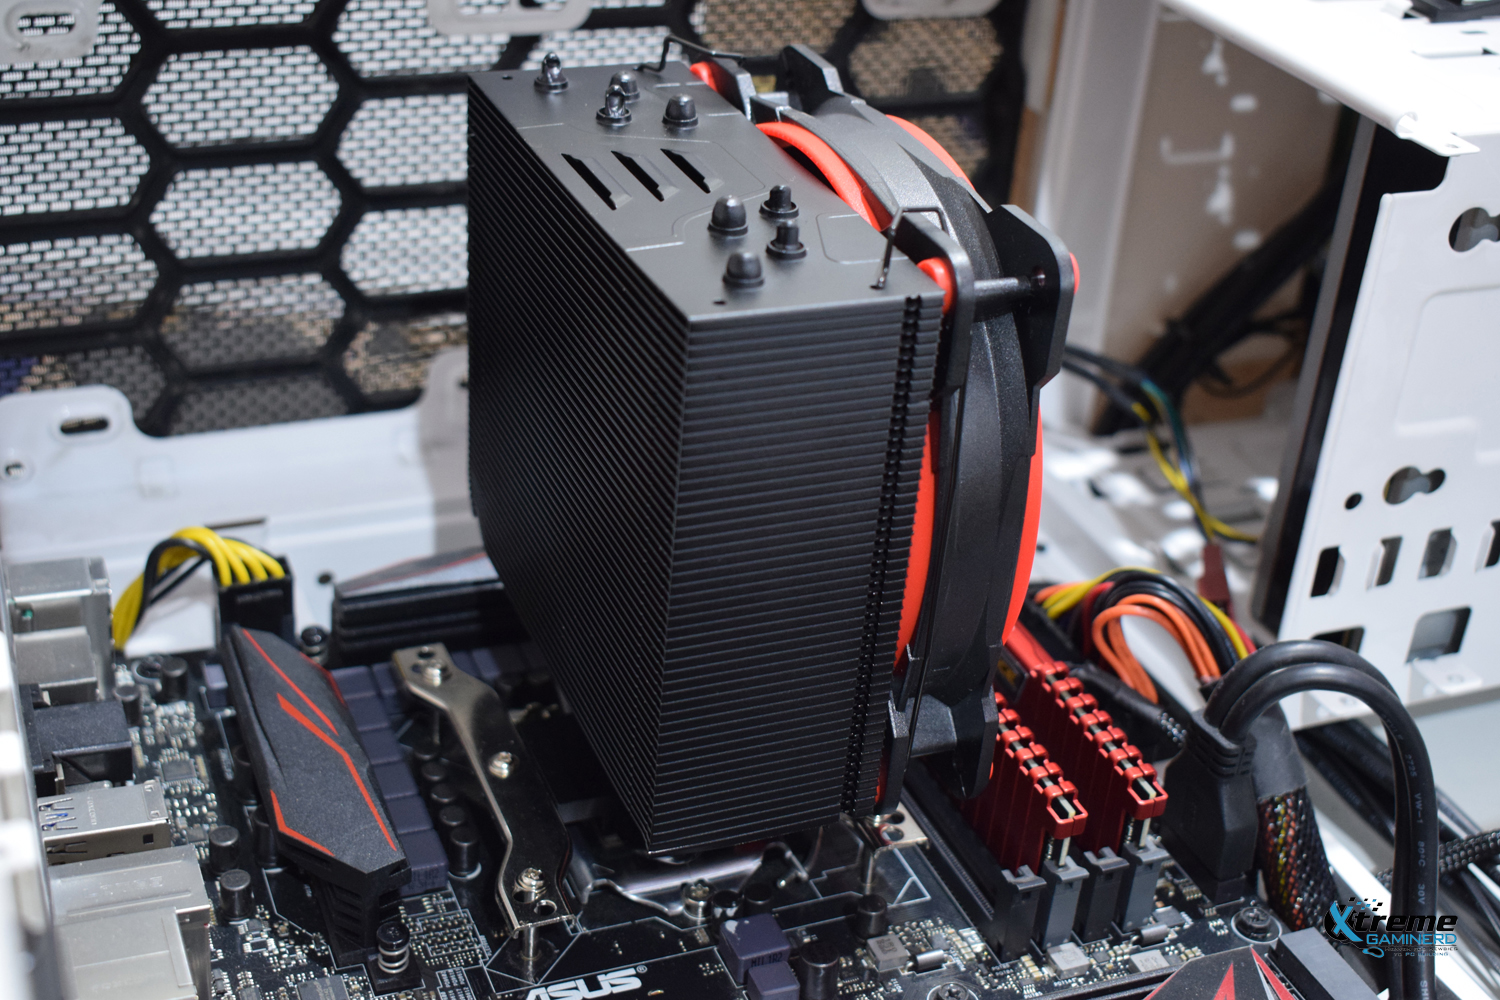
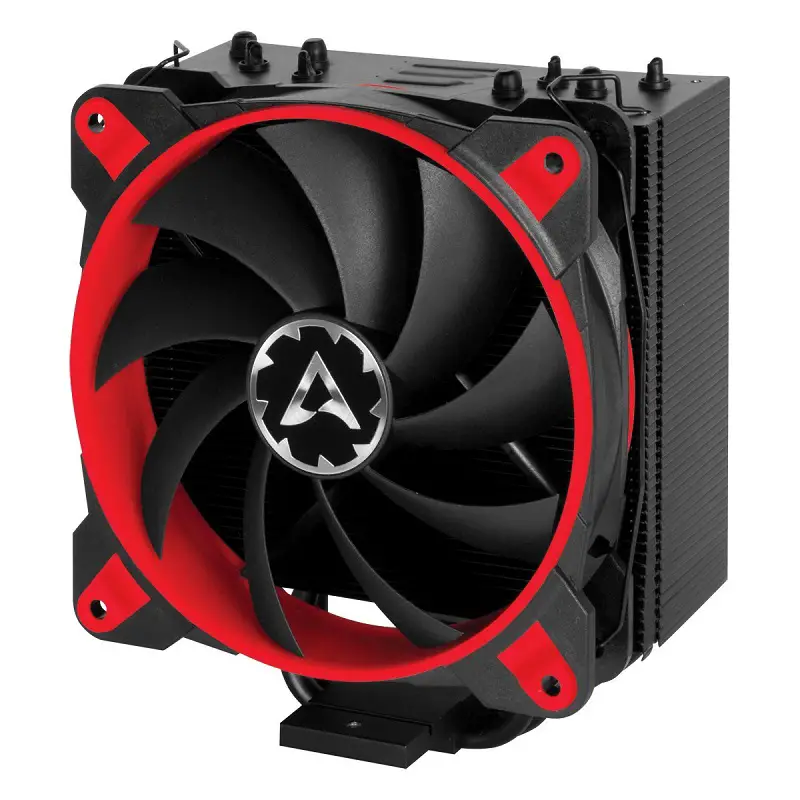
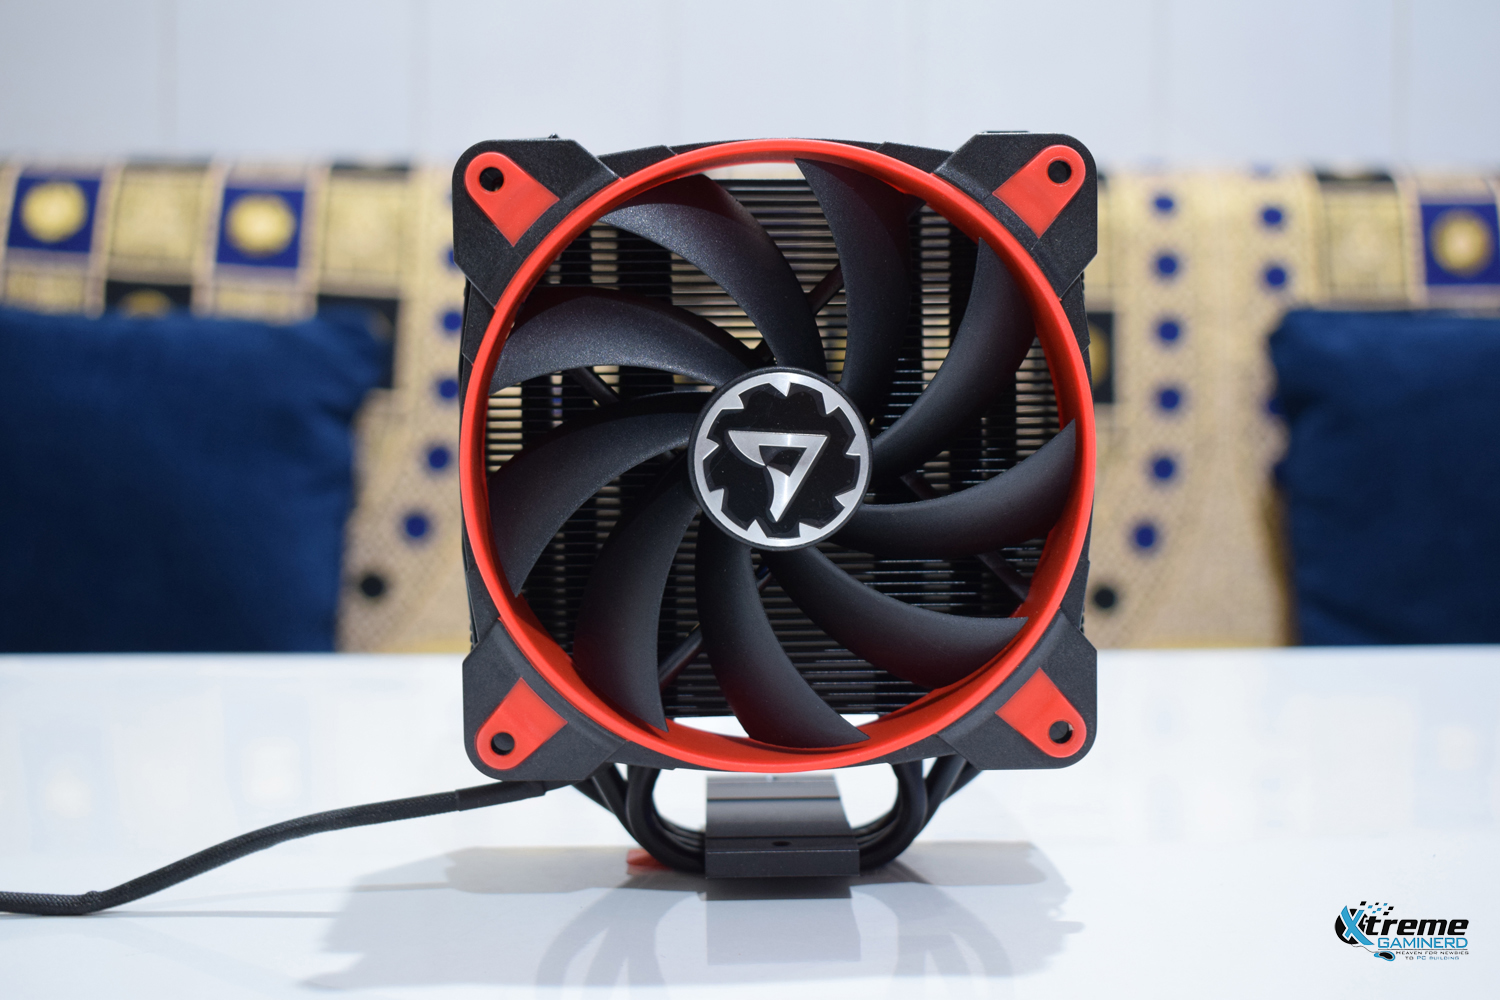
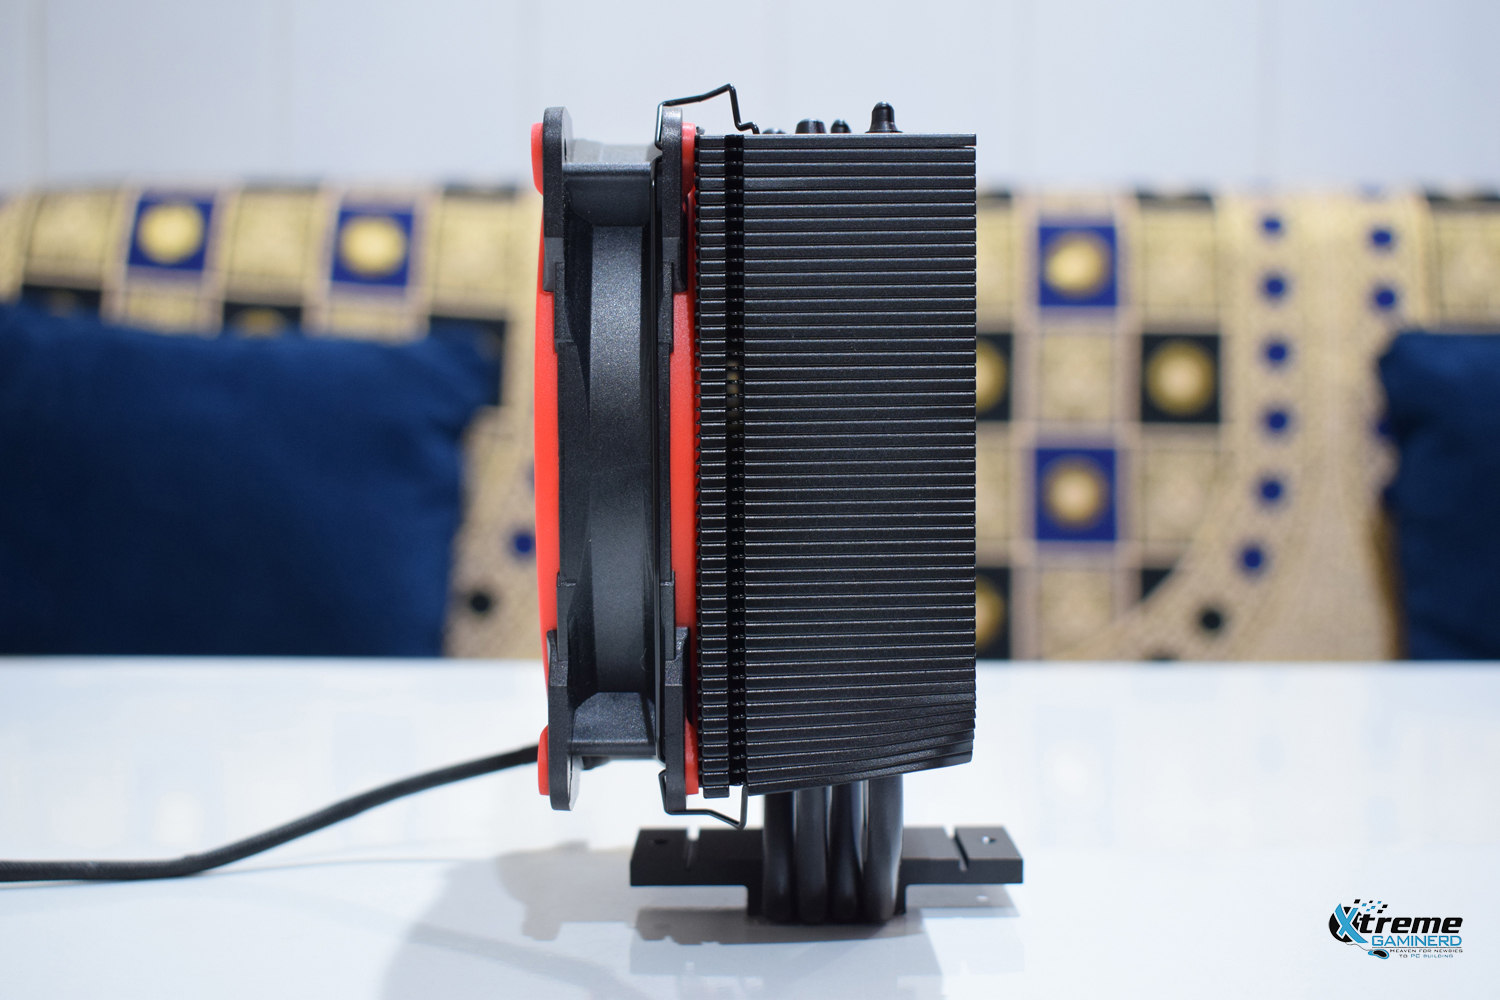
The cooler is pretty much basic from all sides and the black color really looks good on the heatsink. The advantage of a black heatsink is that it goes well with any colour-themed build. Coating the aluminum heatsink for some is not ideal as it may put some minor performance issues but it’s very unnoticeable in real life. Anyways black is a good absorber of heat and coating with a single layer won’t kill the performance.
The black/red colored Bionix F120 fan matches the heatsink well and it’s perfect for any black/red-themed build. There are options if you want to choose a different color. The Arctic is providing, White, Red, Green, and Yellow colored fans for this cooler.
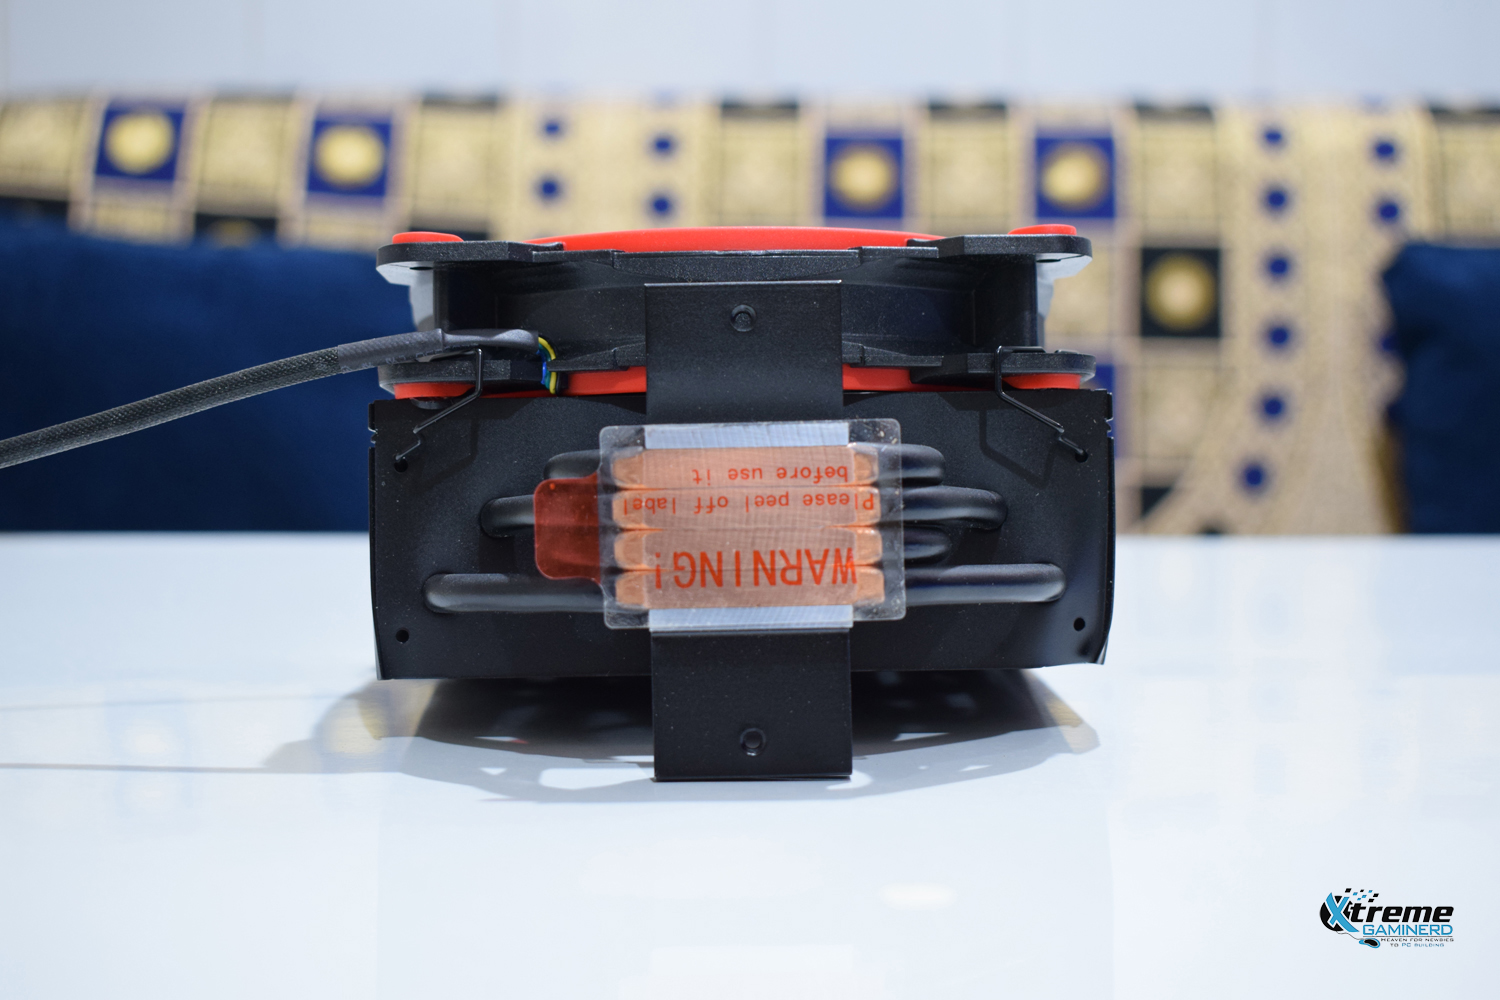
Now take a look at its base. The cooler is using a small aluminum base with 4 copper heat pipes that are passing through it and are exposed to the eye. This means that the heat conductivity will be good as there are a lot of coolers that use the same method and I have tested some of them. This technique saves some costs but still provides good performance.
These 4 copper heat pipes are also painted black and pass through the whole aluminum heatsink and end at the top.
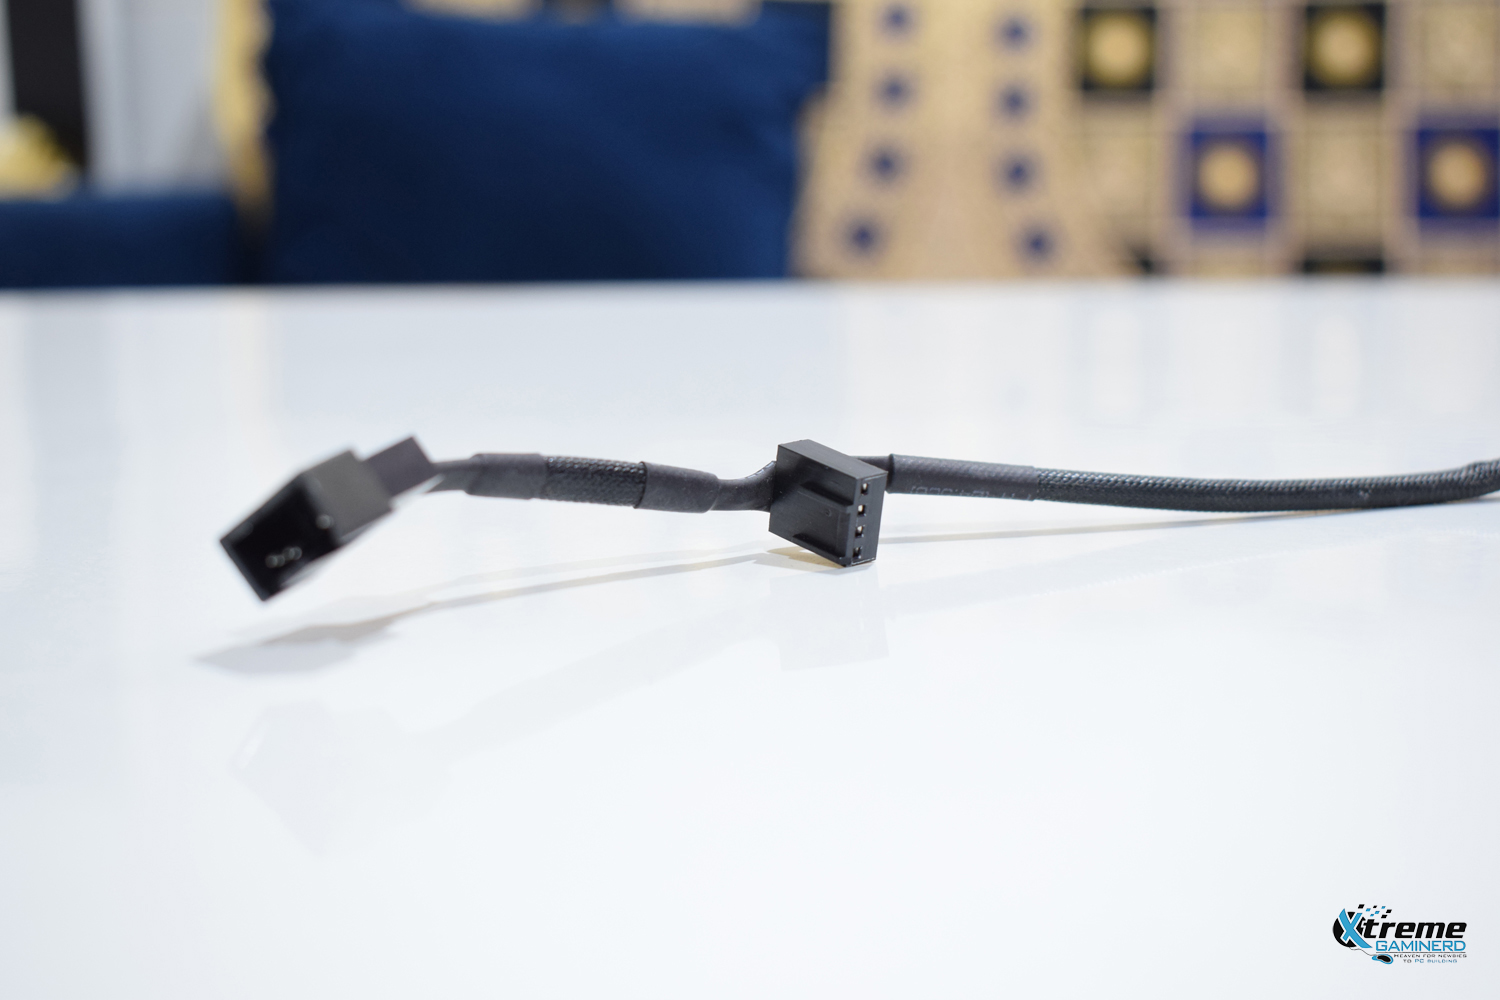
The fan uses the PWM control method and comes with a cable having a male connector along with the 4-pin PWM connector.
Installation
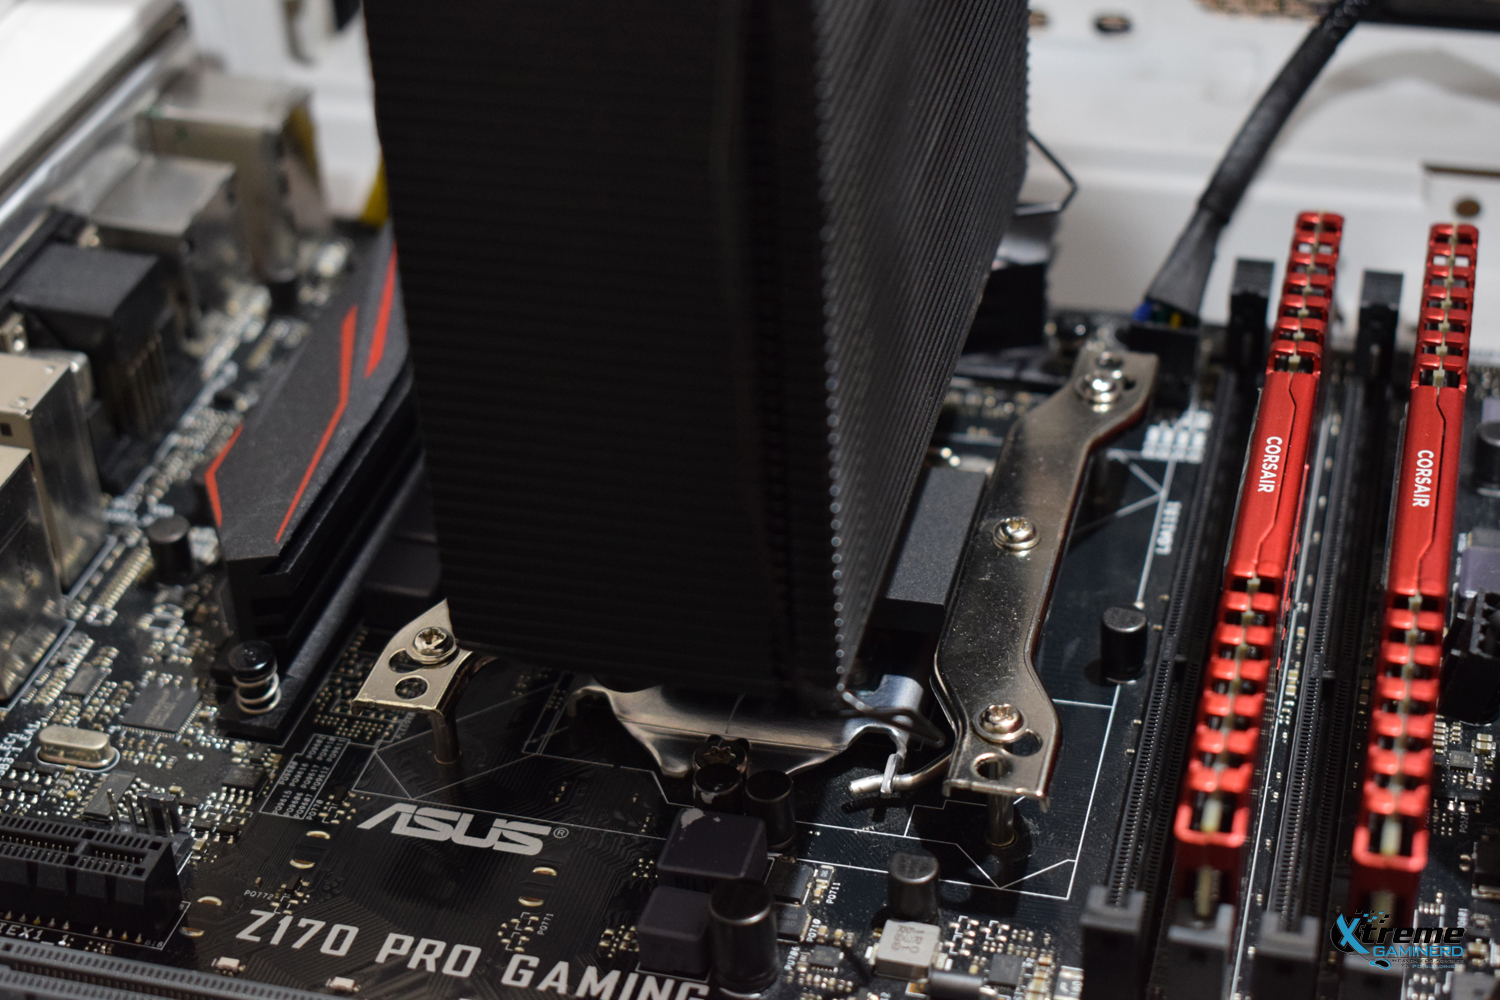
Installation was the easiest I have ever seen on a CPU cooler. Just put the bracket at the back aligning to the screw holes and put the cooler on the top. Then use the two steel clips to fix the cooler on the CPU. I was very happy with the installation method. The more complicated the installation is, the more likely I would like to deduct the rating.
As the cooler uses the universal method of installation, you don’t need to check the manuals for instructions. Just check the back of the cooler box for knowing how to install it. It’s pretty much straightforward.
The cooler didn’t take up too much space but I think that it would be difficult to install it with tall memories if you put one in the first slot. Know that installing the cooler requires you to first remove the fan because you can’t put screws into the clips unless you do that.
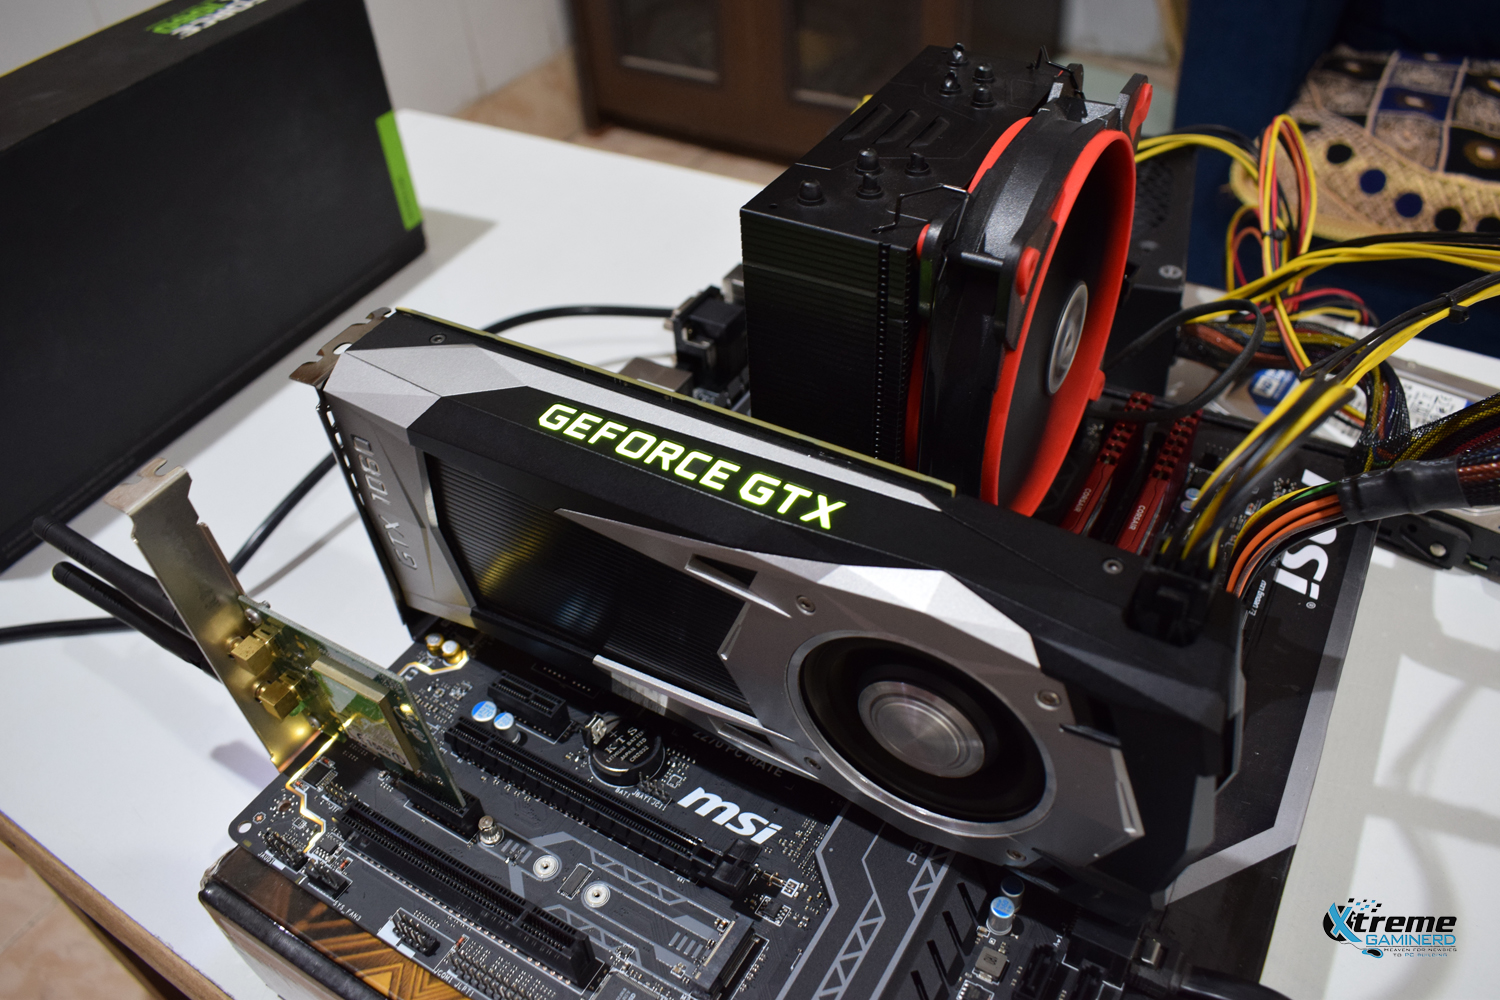
Here is the RIG I used for testing the cooler(I use this same rig for every other cooler to keep the results fair):-
Intel Core i5 6600K: Check on Amazon
MSI Z270 PC Mate: Check on Amazon
2x 4GB DDR4 2400Mhz Corsair Vengeance LPX: Check on Amazon
Nvidia GTX 1060 6GB Founders Edition: Check on Amazon
320GB WD HDD: Check on Amazon
TP-Link N300 Wifi PCI Card: Check on Amazon
Antec VP450: Check on Amazon
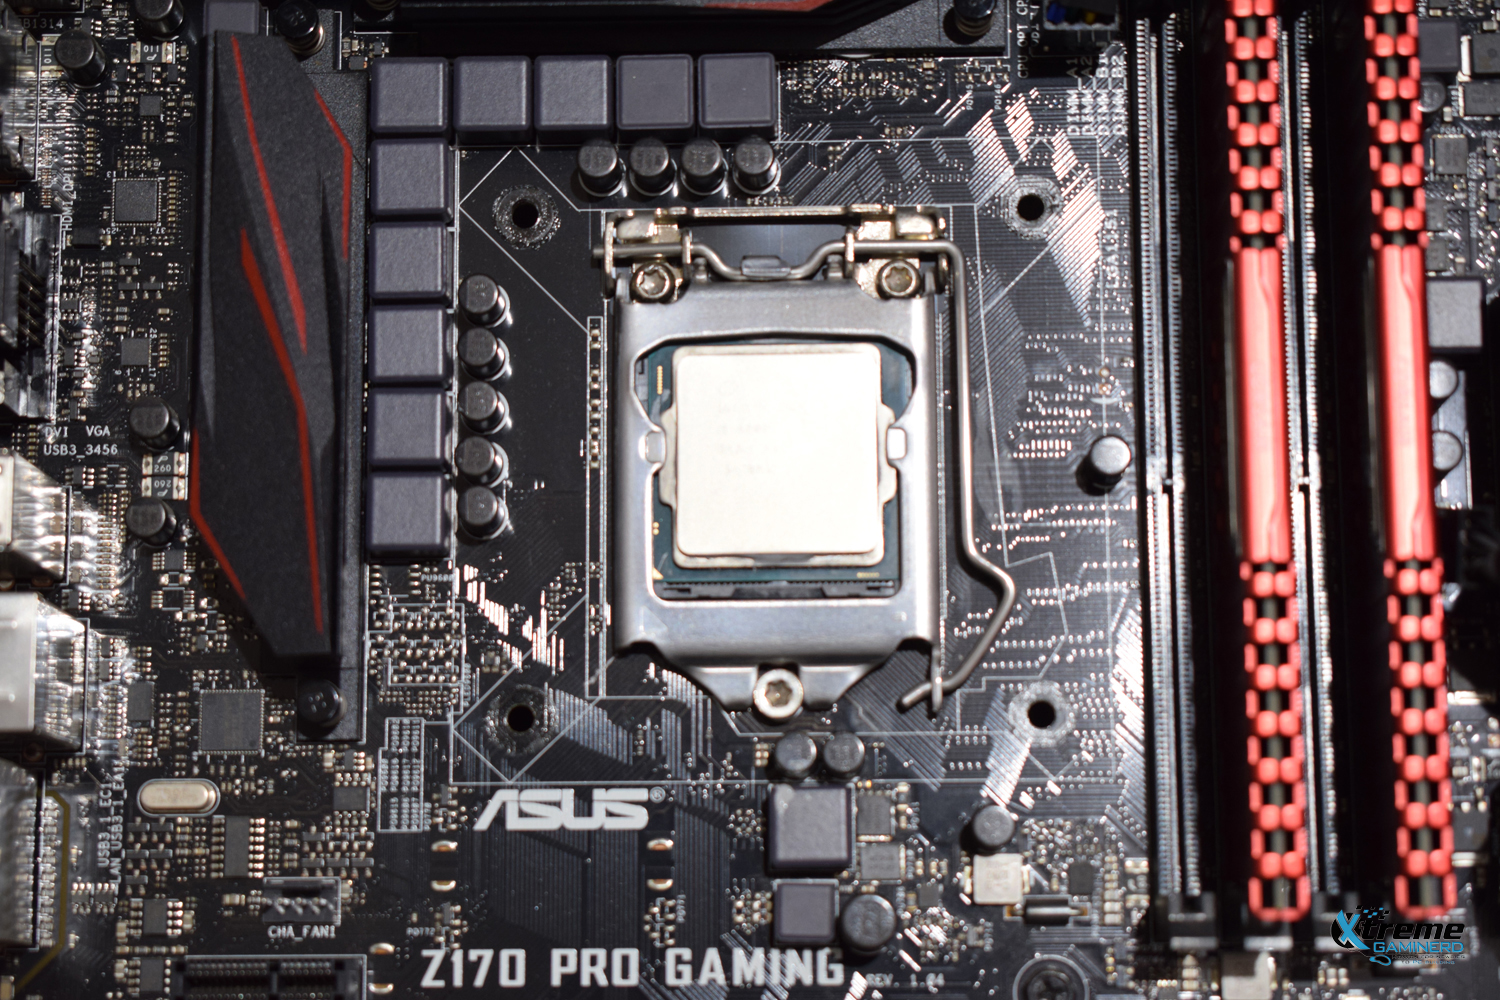
This time, there is some change in the testing rig methodology. The first one is the change of motherboard. As my previous motherboard, the Asus Z170 Pro gaming died, I used the MSI Z270 PC Mate which should be almost equivalent to the Asus one. Though, I miss the AI Suite 3 software through which it was very easy to overclock and tweak different parts.
The other change was the removal of the cabinet. I took out everything to make the cooler work at its best. The result will, however, vary if used with a closed chassis but as I tested every other CPU cooler with my cabinet opened from all sides, this should put no difference to the testing.
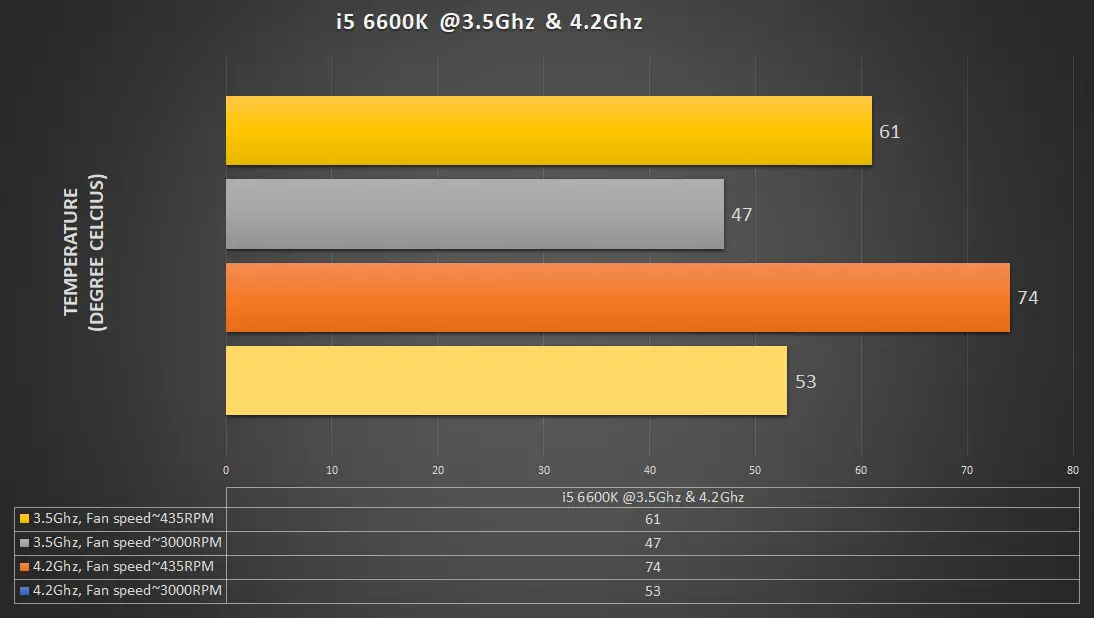
Another different thing this time was that I wasn’t able to overclock the CPU to 4.5GHz. It kept crashing. I don’t know why so I just ended up doing it at 4.2 GHz. I generally use two clock speeds for testing: 3.5Ghz and 4.5Ghz on all cores but this time I did with 3.5Ghz and 4.2Ghz. I think it is still ok because this CPU cooler is not meant for breaking overclocking world records.
Testing Environment and Methodology
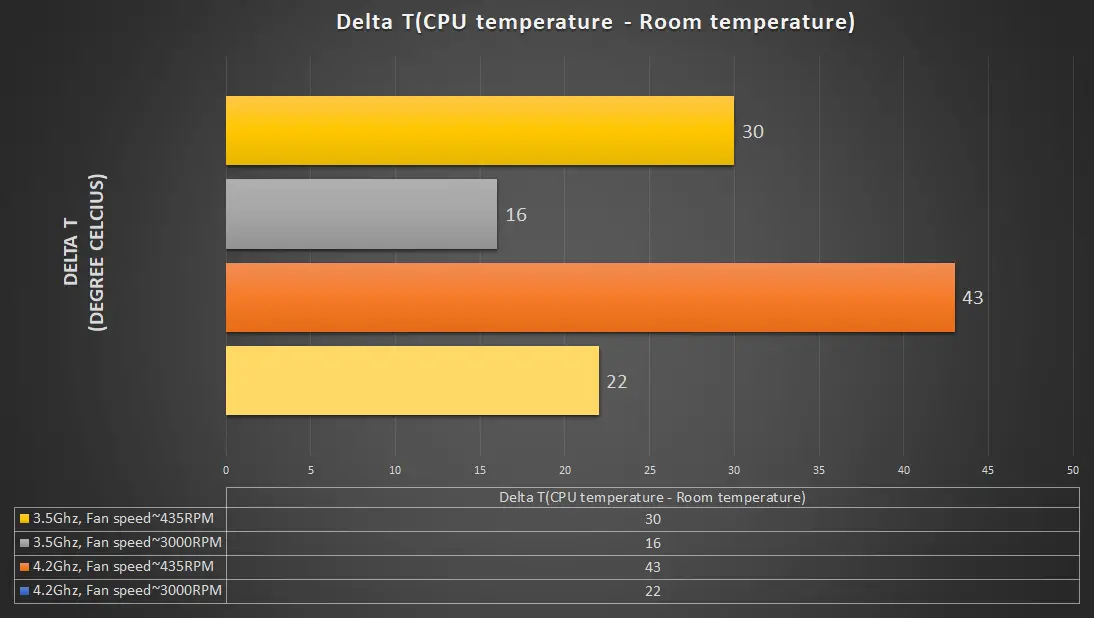
Testing was done at 31 Degree C room temperature and as different coolers are tested in different seasons, I will also include the Delta T benchmarks to keep the comparison fair. Delta T will be obtained by subtracting the room temperature from the temperature of the CPU after benchmarking. So for example, if the room temperature is 25C and the CPU temperature after benchmarking is 60C, then Delta T will be equal to 60C- 25C= 45C. This will be done to make the comparison of different CPU coolers tested in different seasons fair.
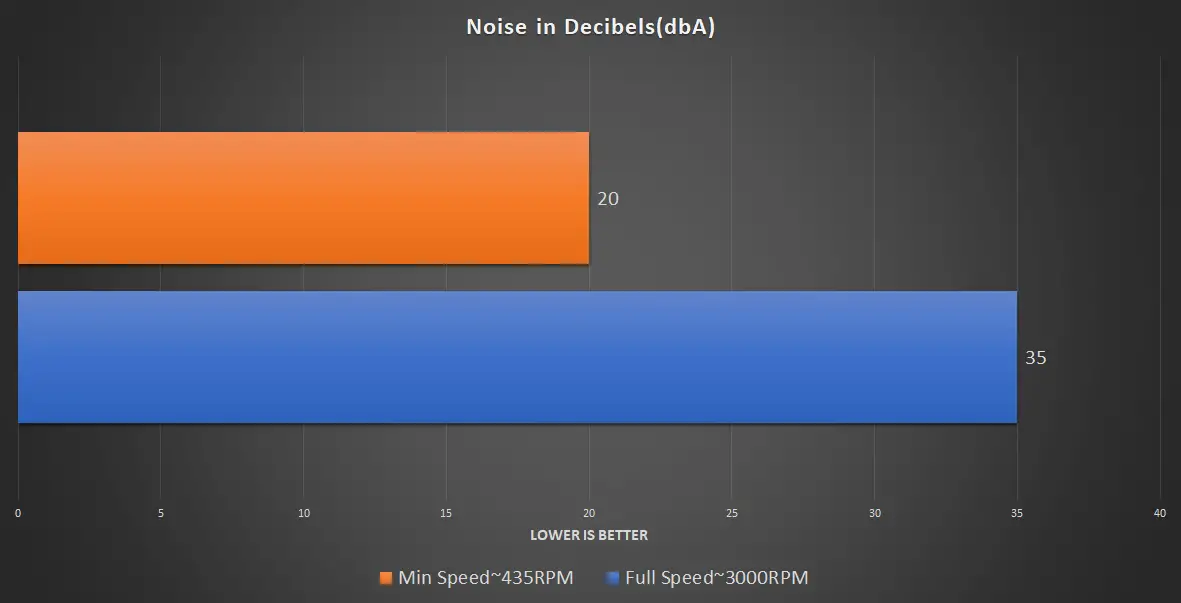
Noise testing was done by an LCD noise tester in a silent room after switching off every fan in the case except that of the PSU. The tester was kept around 1 inch far away from the CPU cooler Fan.
The software used was Heavyload for stress testing the CPU, which was used for 10 minutes for each benchmark, and then 5 minutes were given to the CPU cooler to cool down at its full speed until the temperature went to its initial idle temperature. For measuring the temperature of the CPU and fan speed I use CPUID HWMonitor. For overclocking the CPU I used the Intel Extreme Tuning Utility and for tweaking the fan speed I used the MSI Bios.
Final Words: Should You Buy It?
As you can see from the graphs above, the cooler performs decent enough to justify its price of $30, however, note that it is not the best option for overclocking. If you use this for mild overclocking, then it is surely good but I recommend turning the fan to max speed if you want to achieve good results. Going below 1000 RPM will take the temperatures high in the ’70s for sure. At 3000RPM, it becomes loud but managing the speed somewhere between 2000-2500RPM will be a wise choice where you won’t have to deal with a loud noise and high temperatures at the same time.
I like how the Arctic has provided a wide speed range of fan operation where you can actually benefit from different circumstances. For instance, if you are not overclocking, just take the fan speed to the minimum and it is damn silent when you overclock it, then take it over 2000RPM to get good results. For $30, there are some coolers that can beat it but Arctic is providing an unmatchable 10 years warranty with this thing. I don’t think that there is anything better than that.


![Skip to main contentSkip to toolbar About WordPress Xtremegaminerd 22 Plugin Updates New Autoptimize Breeze Disqus SEO Purge SG Cache Howdy, Sarfraz Log Out Help Screen Options Add New Post The following plugins need to be updated to their latest version to ensure maximum compatibility with this theme: Jannah Extensions and Jannah Switcher. Begin updating plugins Dismiss this notice. Enter title here ARCTIC Freezer 33 eSports ONE Review Permalink: https://www.xtremegaminerd.com/arctic-freezer-3…ports-one-review/ Edit Enter sub title here Enter sub title here Add Media Add Form Add Submissions Insert downloadBetter Links Add Contact Form EasyAzonVisualTextPage Builder Paragraph P Word count: 5 Draft saved at 4:30:40 pm. Toggle panel: Publish Preview (opens in a new window) Status: Draft Edit Edit status Visibility: Public Edit Edit visibility Publish immediately Edit Edit date and time Publicize: Twitter: @sarfrazk638 Twitter: @xtremegaminerd1 LinkedIn: Sarfraz khan Tumblr: sarfrazk9.tumblr.com Google+: Xtremegaminerd Google+: Sarfraz Khan Edit Settings Move to Trash Toggle panel: Categories All Categories Most Used Cases Comparison Coolers Cpu Coolers Fans Deals Desks Gaming Gaming Builds Gaming chairs Giveaway Graphics cards Guides Laptops Memory Motherboards News Games Hardware Peripherals Audio Controllers Headsets Keyboards Mice Monitors Mouse pads Routers Tablets Power Supplies Processors Reviews Storage devices Uncategorized VR Workstation + Add New Category Toggle panel: Tags Add New Tag Separate tags with commas Remove term: ARCTIC Freezer 33 eSports ONE ARCTIC Freezer 33 eSports ONERemove term: Arctic Arctic Choose from the most used tags Toggle panel: Featured Image Set featured image Toggle panel: Show AMP for Current Page? Show Hide Toggle panel: Author Author Toggle panel: Sharing Show sharing buttons. Toggle panel: All in One SEO Pack Main SettingsSocial Settings Help Title 0 characters. Open Graph allows up to a maximum of 95 chars for the title. Description 0 characters. Open Graph allows up to a maximum of 1000 chars for the description. Image Custom Image Specify Image Width Specify Image Height Custom Video Facebook Object Type Facebook Debug Debug This Post Article Section Article Tags Twitter Card Type Custom Twitter Image Toggle panel: Page Links To Point this content to: Its normal WordPress URL A custom URL New Features Coming Soon! Do you have a minute? Please take this quick survey and help me decide what features to build next! Toggle panel: Reviewer | Reviews Boxes In this meta box you can manage the reviews boxes for the post. You can find more informations about Reviewer Box or Users Box types inside documentation. Save/update the post to save reviews boxes. Add new reviews box Toggle panel: Reviewer | Post Comparison Tables In this meta box you can manage the post comparison tebles; save/update the post to save comparison tables. Add new comparison table Thank you for creating with WordPress. Version 4.9.6 Term added. No results found. Sumo Close media panel Add Media Filter by typeFilter by dateSearch Media Search media items... ATTACHMENT DETAILS Arctic-Freezer-eSports-One-3.jpg June 21, 2018 751 KB 1500 × 1000 Edit Image Delete Permanently URL https://www.xtremegaminerd.com/wp-content/uploads/2018/06/Arctic-Freezer-eSports-One-3.jpg Title Arctic Freezer eSports One 3 Caption Alt Text Skip to main contentSkip to toolbar About WordPress Xtremegaminerd 22 Plugin Updates New Autoptimize Breeze Disqus SEO Purge SG Cache Howdy, Sarfraz Log Out Help Screen Options Add New Post The following plugins need to be updated to their latest version to ensure maximum compatibility with this theme: Jannah Extensions and Jannah Switcher. Begin updating plugins Dismiss this notice. Enter title here ARCTIC Freezer 33 eSports ONE Review Permalink: https://www.xtremegaminerd.com/arctic-freezer-3…ports-one-review/ Edit Enter sub title here Enter sub title here Add Media Add Form Add Submissions Insert downloadBetter Links Add Contact Form EasyAzonVisualTextPage Builder Paragraph P Word count: 5 Draft saved at 4:29:33 pm. Toggle panel: Publish Preview (opens in a new window) Status: Draft Edit Edit status Visibility: Public Edit Edit visibility Publish immediately Edit Edit date and time Publicize: Twitter: @sarfrazk638 Twitter: @xtremegaminerd1 LinkedIn: Sarfraz khan Tumblr: sarfrazk9.tumblr.com Google+: Xtremegaminerd Google+: Sarfraz Khan Edit Settings Move to Trash Toggle panel: Categories All Categories Most Used Cases Comparison Coolers Cpu Coolers Fans Deals Desks Gaming Gaming Builds Gaming chairs Giveaway Graphics cards Guides Laptops Memory Motherboards News Games Hardware Peripherals Audio Controllers Headsets Keyboards Mice Monitors Mouse pads Routers Tablets Power Supplies Processors Reviews Storage devices Uncategorized VR Workstation + Add New Category Toggle panel: Tags Add New Tag Separate tags with commas Remove term: ARCTIC Freezer 33 eSports ONE ARCTIC Freezer 33 eSports ONERemove term: Arctic Arctic Choose from the most used tags Toggle panel: Featured Image Set featured image Toggle panel: Show AMP for Current Page? Show Hide Toggle panel: Author Author Toggle panel: Sharing Show sharing buttons. Toggle panel: All in One SEO Pack Main SettingsSocial Settings Help Title 0 characters. Open Graph allows up to a maximum of 95 chars for the title. Description 0 characters. Open Graph allows up to a maximum of 1000 chars for the description. Image Custom Image Specify Image Width Specify Image Height Custom Video Facebook Object Type Facebook Debug Debug This Post Article Section Article Tags Twitter Card Type Custom Twitter Image Toggle panel: Page Links To Point this content to: Its normal WordPress URL A custom URL New Features Coming Soon! Do you have a minute? Please take this quick survey and help me decide what features to build next! Toggle panel: Reviewer | Reviews Boxes In this meta box you can manage the reviews boxes for the post. You can find more informations about Reviewer Box or Users Box types inside documentation. Save/update the post to save reviews boxes. Add new reviews box Toggle panel: Reviewer | Post Comparison Tables In this meta box you can manage the post comparison tebles; save/update the post to save comparison tables. Add new comparison table Thank you for creating with WordPress. Version 4.9.6 Term added. No results found. Sumo Close media panel Add Media Filter by typeFilter by dateSearch Media Search media items... UPLOADING 7 / 7 – Arctic Freezer eSports One cable.jpg ATTACHMENT DETAILS Arctic-Freezer-eSports-One-3.jpg June 21, 2018 751 KB 1500 × 1000 Edit Image Delete Permanently URL https://www.xtremegaminerd.com/wp-content/uploads/2018/06/Arctic-Freezer-eSports-One-3.jpg Title Arctic Freezer eSports One 3 Caption Alt Text Description Smush 10 images reduced by 121.6 KB ( 22.2% ) Image Size: 750.9 KB Smush stats [+] ATTACHMENT DISPLAY SETTINGS Alignment Link To Size 7 selected Edit SelectionClear Insert into post Description Smush 10 images reduced by 121.6 KB ( 22.2% ) Image Size: 750.9 KB Smush stats [+] ATTACHMENT DISPLAY SETTINGS Alignment Link To Size 7 selected Edit SelectionClear Insert into post](https://www.xtremegaminerd.com/wp-content/uploads/2018/06/Arctic-Freezer-eSports-One-3.jpg)
